Escape from Detention Walkthrough
Escape from Detention Solution

You can play the Windows Version here.
I think I fell asleep...
Oh gross... drool.
I need to ESCAPE FROM DETENTION!
Detention stinks! I need out!
Your game starts in the detention class.

Take the apple from the desk.
Take the dial from the pencil sharpener on the desk.
If you zoom in on the black board, you will notice some writing "green".
Go right to the big mess.

Take the piece of paper under the center blue chair.
Zoom in on the paper in your inventory, then tear off the bottom right corner.
Go right to the back of the room.

Look at the bulletin board on the wall.
Add the dial to mask out the numbers 3,4,8

Take the blackboard eraser from the bottom left corner of the bulletin board
Go right then zoom in on the black board.
Use the eraser to show the clue: red, green, blue

The red, green, blue is a hint to the order of the lock combination.
Look again at the numbers on the bulletin board and you will notice the 8 is green, 3 is blue, and 4 is red.
So the correct order will be 4, 8, 3.
Zoom in on the eraser then take the back part off - ah, a straw.
Go right to the messy part.
Zoom in on the access control door.
Use the code 483 to open the lock.

Zoom out and click the handle to open.
Exit the detention room.
You are now in the passage way full of lockers.

Pick up the scalpel from the floor.
Enter room 1B on the left.
It is the Janitor's closet.

Zoom in on the garbage then take the rotten banana.
Zoom in on the shelf with cleaning supplies and take the pink lemon from the pink bottle.
Zoom in on the sink.
Turn on the tap.
Use the piece of paper on the water to make a wet ball of paper.
Zoom in on the straw, then add the wet paper to the left to make a pea-shooter.
Exit the Janitor's Room then go forward to the main office.

Take the knife from the bottom drawer of the desk.
Enter the principal's office.
Take the pear-logo from the laptop.
Open the blinds.
Zoom in on the carpet to the right of the desk.
Open the knife, then use the knife to cut the carpet.
Now you know where the escape hatch is located!

Go back out to the locker passage.
Use the red down arrow

Enter the first room on the left. "1D".
It is the girls bathroom.
Take the binoculars from the 1st toilet.
Go right.
Take the drum stick next to the trash can.
Exit.
Enter 1C on the right.
The music room.

Zoom in on the drum set.
Use the drum stick to smash the big drum.
Take the cassette.
Zoom in on the grand piano and take the minty mints.
Exit.
Enter room 1E on the end on the left.
The Science Classroom.

Take the frog.
Zoom in on the frog.
Use the scalpel on the frog.
Take the quarter coin.
Go to the principals' office.
Use the binoculars on the open window.
See the code 354
Go out, then left to the vending machine.
Zoom in on the coin slot.
Add the quarter.
Correct the fruit colors as per your inventory:
Pink lemon, black banana, white pear, green apple.

Go down and take the tape-recorder from the vending outlet.
Go back to the science class and zoom in on the hamster in the back corner.
Zoom in on the tape recorder and insert the "hamster lullabies" cassette.
Place the tape recorder left of the cage.
Play.

The hamster goes to sleep...
Take the small master key from under the spinning wheel.
Go to the locker passage.
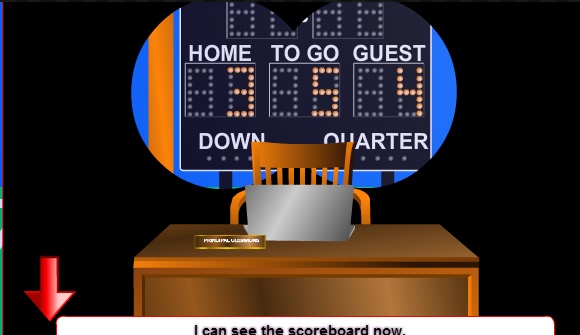
Search for locker 354 (clue from the sport scoreboard)
Use the master key to open.

Take the bottle of soda
Go back to the science class.
Zoom in on the red-and-white target in the middle.
Add the soda.
Take the cap off.
Insert the mints....

Kaboom Crash! The light above broke!
Zoom in on the light.
Use the pea-shooter to shoot the key down.
Zoom in on the soda then take the skeleton key next to it.
Go to the principal's office
Zoom in on the escape hatch you found earlier...
Use the skeleton key to open the hatch.

Well done on a great escape!!
Hope you enjoyed this escape from detention walkthrough! If you need more help or would like to comment, please use the comment section below. Happy escape-gaming!
You have read this article with the title Escape from Detention Walkthrough. You can bookmark this page URL https://putas-y-zorras.blogspot.com/2013/06/escape-from-detention-walkthrough.html. Thanks!


.jpg)

No comment for "Escape from Detention Walkthrough"
Post a Comment